User Guide
AutoEstimate is built for independent repair shops and mobile mechanics. Check the car in, add the work, and send your customer a professional PDF estimate — then turn the same job into an invoice when the work is done. No account, no desktop software.
- Job — One visit: a customer, their vehicle, and the services you're doing on it. Everything else lives inside the job.
- Service — A line on the job: labor and parts for one repair, or a shop-supplies fee, a sublet, or a discount.
- Estimate / Invoice — A numbered PDF created from the job's services. Once created it never changes — what you sent stays exactly what you sent.
- Getting started
- Creating a job
- Scanning the VIN
- Your job list
- Adding services
- Pricing labor & parts
- Estimates
- Invoices — getting paid
- Clients & vehicle history
- Service catalog & your prices
- Shop profile & document settings
- Exporting invoices for your accountant
- iCloud sync & Recently Deleted
- Free vs. Pro
- Need help?
01Getting started
The first launch takes two short steps. There's no account to create — everything you enter stays on your iPhone and in your private iCloud.
- Set up your shop — shop name and phone number, plus your logo if you have one handy (you can add it later in Settings).
- Location & tax — pick your country and state or province. In Canada, AutoEstimate fills in your provincial taxes for you (for example GST + QST in Quebec, HST in Ontario). In the US, enter your combined state and local sales tax rate.
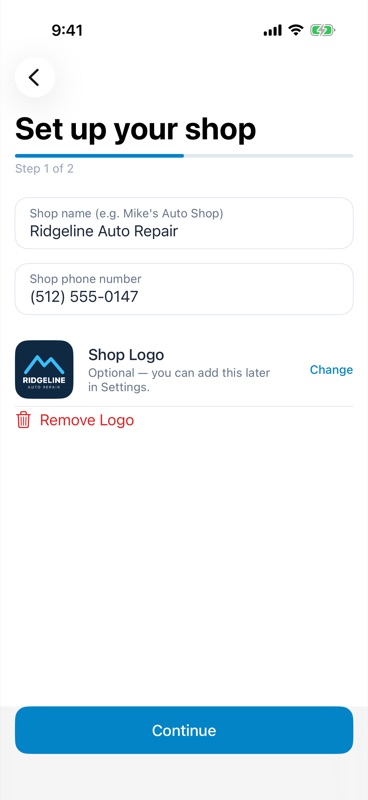
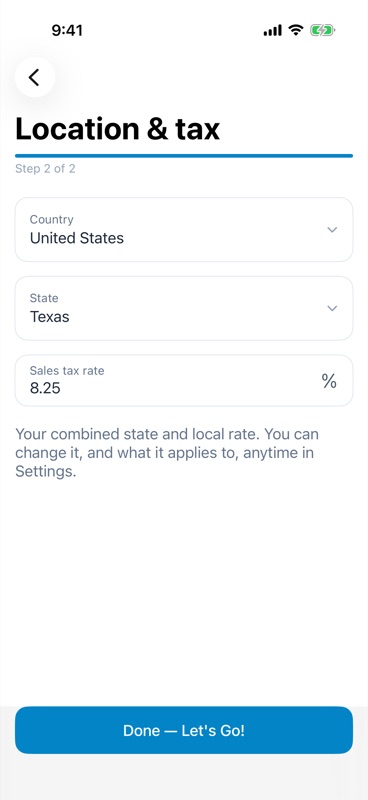
Your location also sets the currency, the registration numbers your documents need, and any local requirements — you can change all of it later under Settings → My Shop.
02Creating a job
Tap the + button on the Jobs tab. A new job takes two steps — the work itself is added afterwards, because the car is often checked in before you know what it needs.
Step 1 — CustomerStart typing the customer's name. Returning customers show up as suggestions — tap one to pull in their phone and email. For a new customer, just fill in the name and phone (email is optional) and tap the arrow.
Step 2 — VehicleA returning customer's vehicles are listed at the top — tap one to reuse it. Otherwise pick the Year, Make, and Model (choose Other… if the model isn't listed), and add the mileage, VIN, license plate, and color if you have them. Tap the checkmark to create the job.
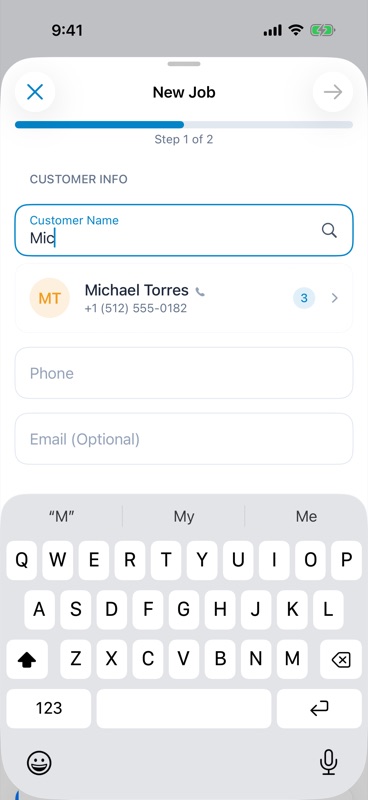
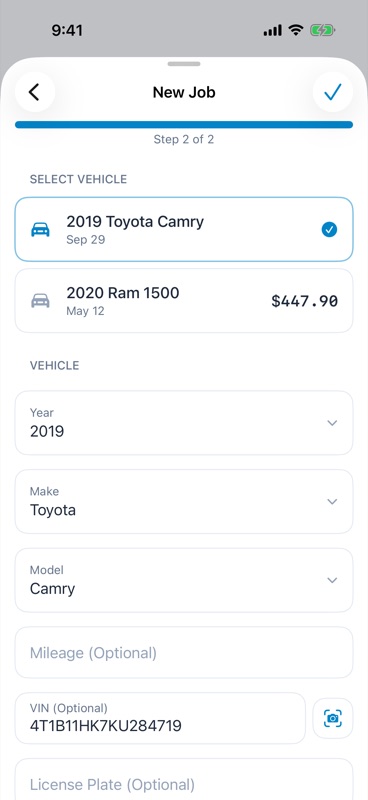
The job opens straight on its Work Items tab, ready for services. Changed your mind halfway? Tap ✕ and Discard — a discarded job isn't counted against your free jobs.
03Scanning the VIN
On the vehicle step, tap the camera button next to the VIN field and point your iPhone at:
- the barcode on the door-jamb sticker — the fastest and most reliable option, or
- the VIN plate at the base of the windshield.
AutoEstimate checks the VIN's check digit before accepting it. If a printed VIN can't be verified, it stays highlighted on screen — tap it to use it anyway. Use the flashlight button in a dark bay.
As soon as a full 17-character VIN is in — scanned or typed — the year, make, and model fill in automatically.
Note: Decoding a VIN into year, make, and model looks it up in the NHTSA vehicle database, so it needs an internet connection. Without one, the VIN is still saved — just pick the year, make, and model yourself.
04Your job list
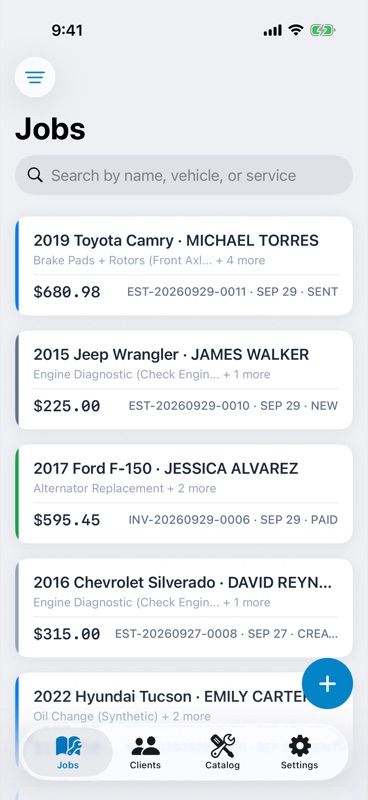
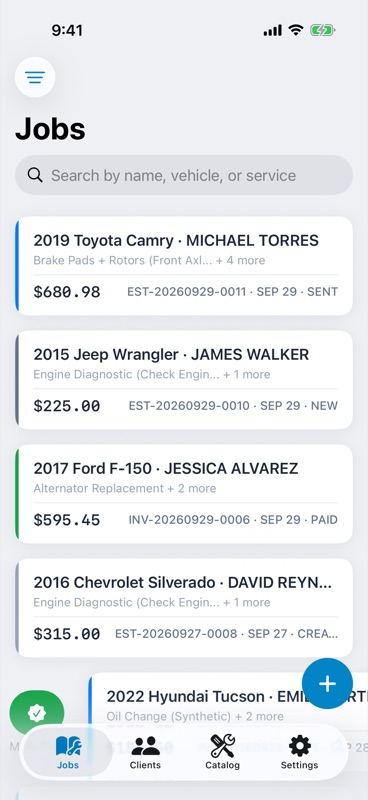
The Jobs tab is your home screen. Each card shows the customer, vehicle, services, total, and where the job stands:
- New — no estimate or invoice yet.
- Created / Sent — the latest estimate or invoice has been created, or sent to the customer.
- Paid — the invoice has been paid.
Search by customer name, vehicle, or service, or tap the filter button (top left) to narrow the list by status and date range.
Swipe right on a job to mark its estimate as sent (handed over in person) or its invoice as paid. Swipe left to duplicate a job for a repeat visit, or delete it.
05Adding services
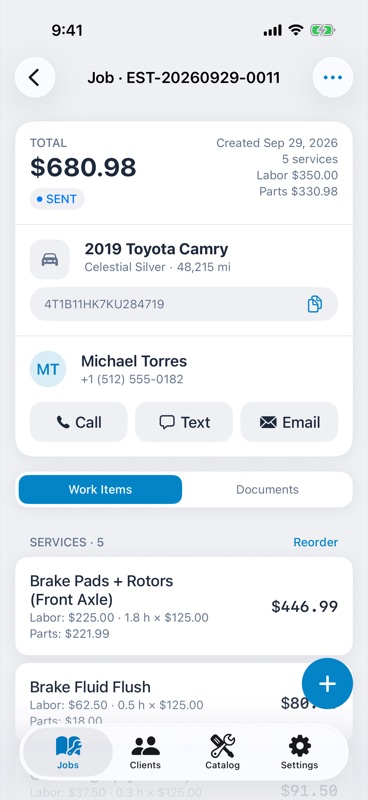
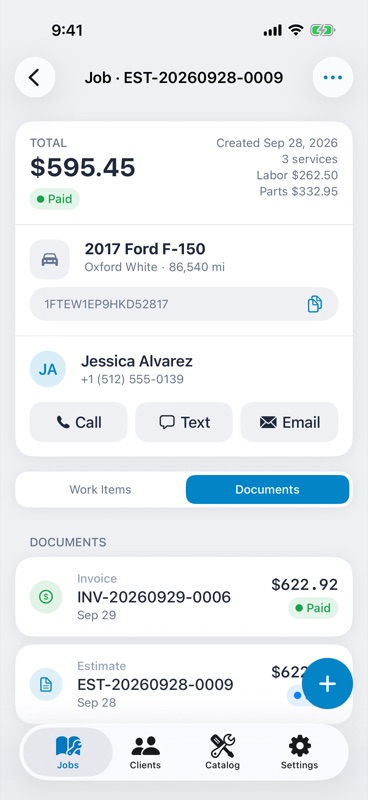
Inside a job, the header shows the running total with its labor and parts split, the vehicle (tap the VIN to copy it), and the customer with Call, Text, and Email buttons. Below it are two tabs: Work Items and Documents.
On Work Items, tap + to add services:
- From Catalog — 70+ common repairs in 10 categories: oil & fluids, brakes, engine, suspension & steering, tires & wheels, electrical, AC & heating, transmission, exhaust, and inspection & diagnostics. Search or browse, tap as many as you need, then tap Add.
- Custom — type a service name with its labor and parts cost for anything that isn't in the catalog.
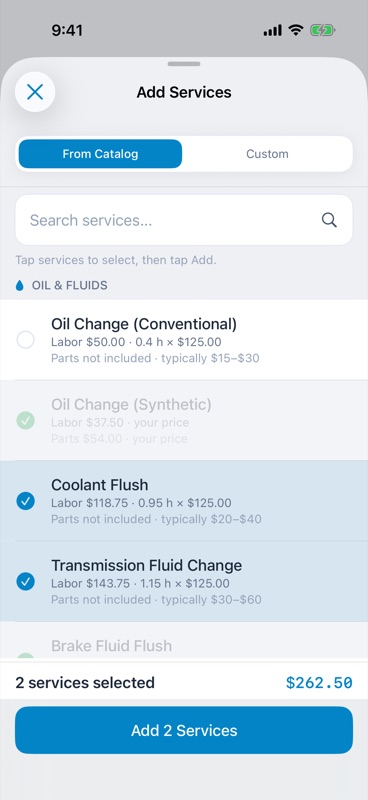
Catalog services come in with labor filled in but no parts price — parts vary too much from car to car. A service still waiting for a parts price is flagged so you don't send it out by mistake. Tap Reorder to change the order services print in, or swipe left on one to remove it.
06Pricing labor & parts
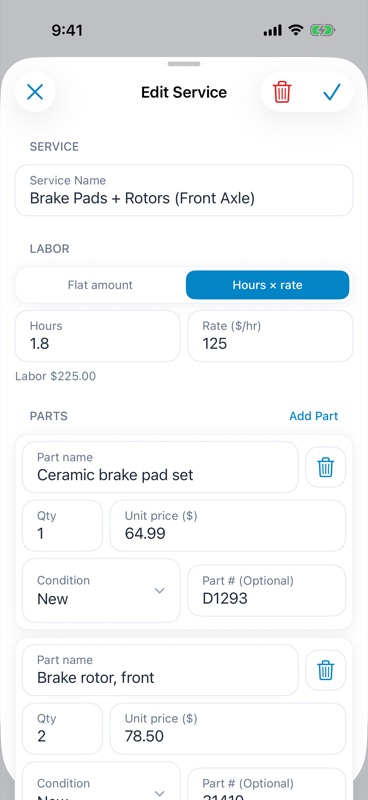
Tap any service to open it.
- Labor — a Flat amount, or Hours × rate using your shop's labor rate. Hourly labor prints on the document as hours × rate.
- Parts — one amount, or tap Itemize to list each part with a quantity, unit price, part number, and condition (New, Used, Rebuilt, or Reconditioned).
- Taxable — turn it off for a line that isn't taxed; it's marked Non-taxable on the job.
- Save as my default price — for catalog services, keep this price for next time. It fills in automatically on every future job.
Custom lines have a Type, so the extras print the way customers expect:
- Shop supplies — rags, cleaners, lubricants. Its own line, taxed like parts.
- Fee — disposal or environmental fees. Its own line, taxed like parts.
- Sublet — work sent out to another shop. Counted as labor.
- Discount — taken off labor, before tax.
07Estimates
The Documents tab lists every estimate and invoice created for the job, newest first, with its number, amount, and status.
To quote the work, tap + → New Estimate:
- All of the job's services are selected — untick any you don't want to quote yet.
- Check the subtotal, each tax on its own line, and the total.
- Set how long the estimate is valid for, and optionally the completion date — when the car will be ready.
- Tap Save & Generate PDF.
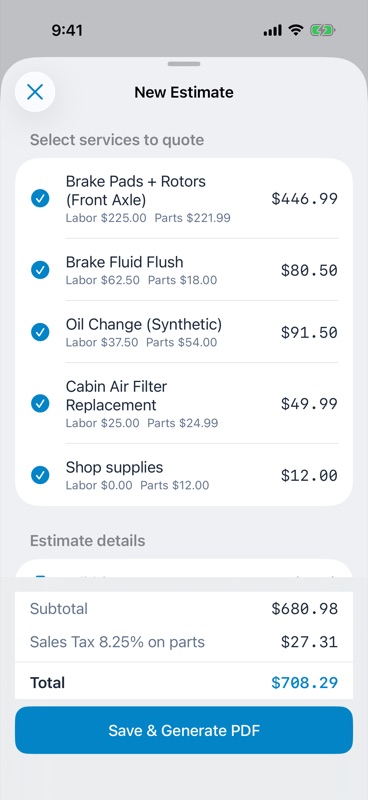
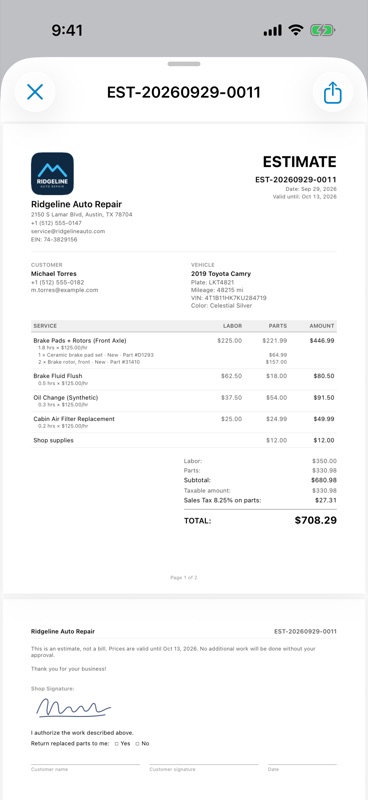
The PDF opens right away, with your logo and shop details, the customer and vehicle, labor and parts for each service, and the totals. Tap the Share button to send it by Messages, Mail, WhatsApp, or AirDrop — it always goes out as an attached PDF, never as a public link. Once it's sent, the estimate is marked Sent. Handed a printed copy over the counter instead? Swipe right on the job and tap Mark Sent.
Estimates are frozen: once created, an estimate never changes, even if you edit the job or your shop settings later. If the work changes, create another estimate — it's numbered as a revision (-R1, -R2…). The customer approves it however you normally work, by phone, text, or in person.
08Invoices — getting paid
When the work is done, go to the job's Documents tab and tap + → New Invoice:
- Select the services to bill — all of them are selected to start.
- Set the date the work was completed, the odometer out reading, and a PO # for business customers.
- Review the totals and tap Save & Generate PDF, then share it the same way as an estimate.
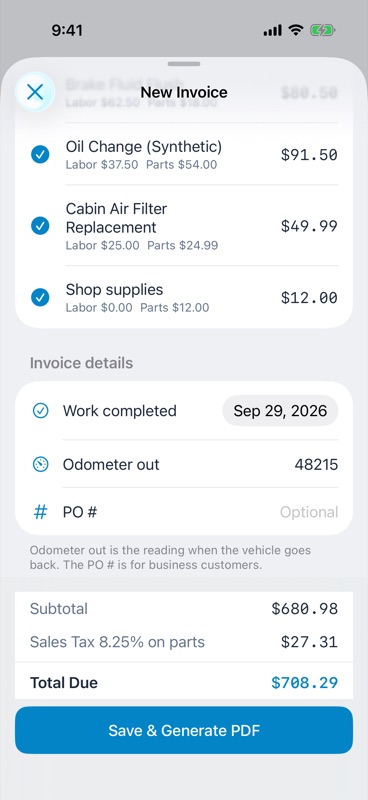
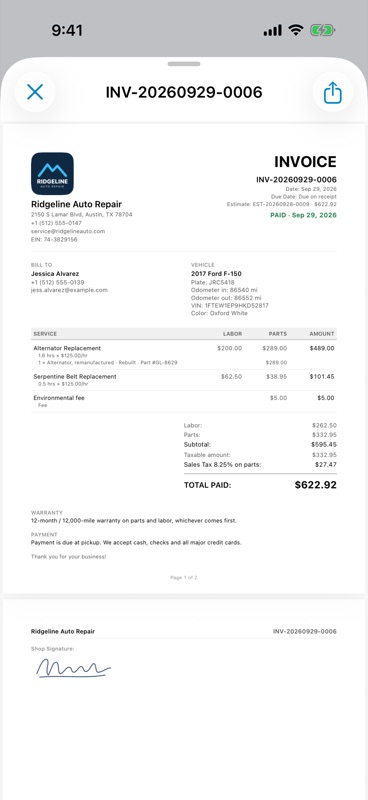
When the customer pays, swipe right on the job in the Jobs list and tap Mark Paid. Enter the payment date and method (cash, check, card, bank transfer, or other). From then on the invoice previews and shares with a PAID stamp — handy as a receipt.
Numbers are never reused: invoices are numbered in sequence across your whole shop. Only an invoice that hasn't been sent yet can be deleted (swipe left on the Documents tab); a sent or paid invoice stays as your record.
09Clients & vehicle history
Every customer you enter on a job is saved to the Clients tab automatically — no separate data entry. You can also tap + to add one by hand, search by name, phone, or vehicle, and change the sort order from the menu at the top left.
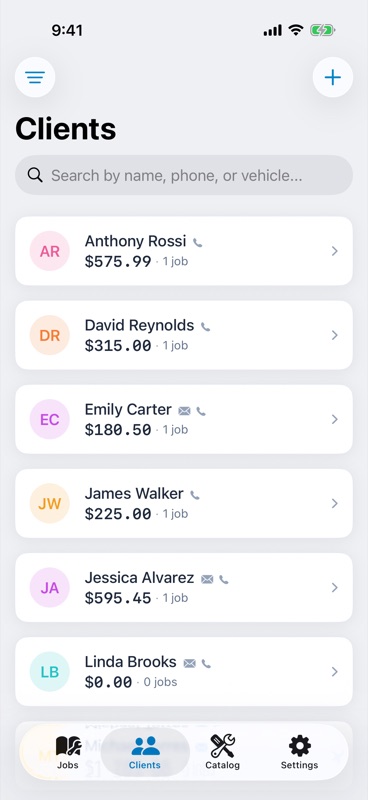
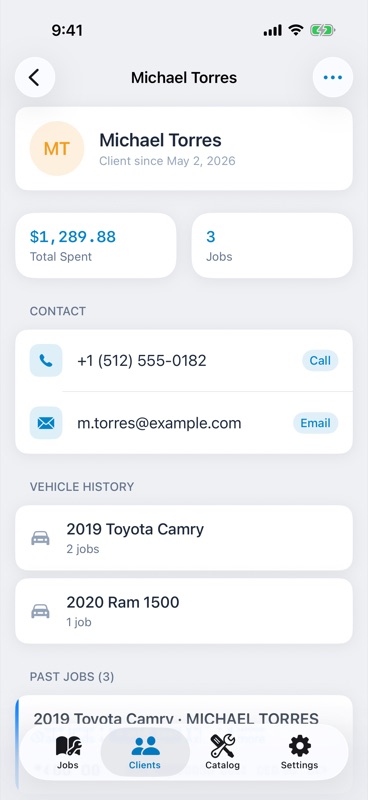
Open a client to see what they've spent with you, call, text, or email them, and browse their vehicle history and past jobs — look up what you did last time before the car is even on the lift. Use the menu to start a New Job for them with their details already filled in.
10Service catalog & your prices
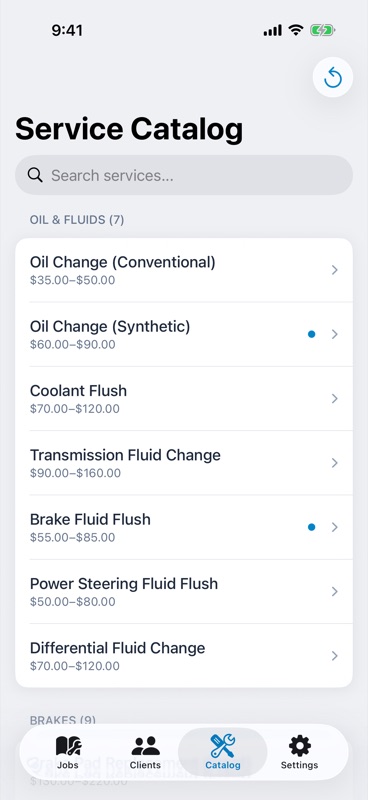
The Catalog tab lists every built-in service by category with its typical price range.
Tap a service to set My Default Prices for labor and parts. From then on it comes into every job at your price instead of the typical one. Services with your own price are marked with a dot; Reset to Catalog Default puts one back, and the button at the top resets them all.
You can also save a price right from a job — turn on Save as my default price when editing a catalog service.
11Shop profile & document settings
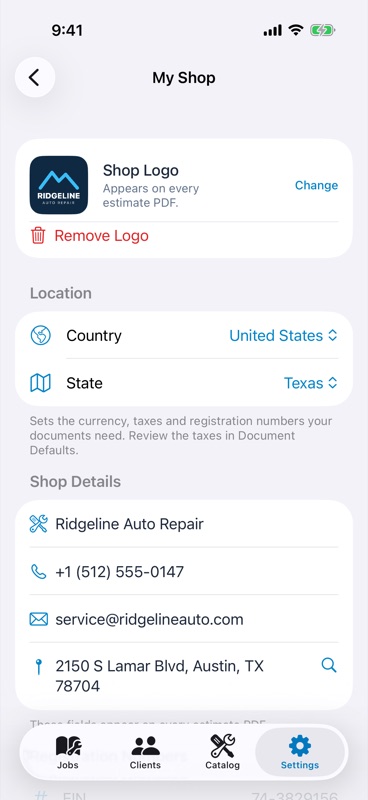
Settings → My Shop holds everything printed in the header of your documents:
- Location — country and state or province, which set your currency, taxes, and registration numbers.
- Shop details — name, phone, email, address, and logo.
- Registration numbers — the ones your location uses: your EIN and repair license number in the US (ARD # in California), or your GST/HST and QST numbers in Canada. Leave blank any that don't apply to you.
- Signature — draw it once and it's added to every estimate and invoice.
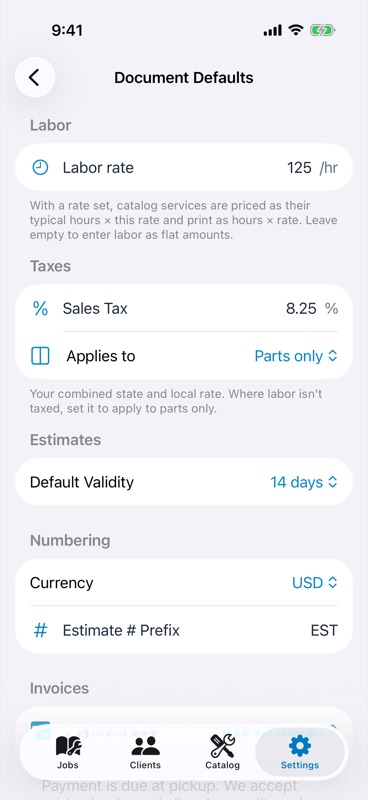
Settings → Document Defaults controls how documents are priced and printed:
- Labor rate — your hourly rate. With a rate set, catalog services are priced as their typical hours × your rate.
- Taxes — each tax's rate and what it applies to: parts and labor, parts only, or labor only. Each tax prints on its own line.
- Estimates — how many days an estimate stays valid by default.
- Numbering — currency and your estimate number prefix.
- Invoices — payment terms (due on receipt, Net 15, 30, or 60) and payment instructions printed under the totals.
- Warranty — your warranty terms, printed on every invoice.
- PDF Appearance — three styles (Classic, Modern, Professional) and the document language, English or French.
Local rules built in: in Ontario, estimates carry the required statement that the final bill can't exceed the estimate by more than 10%, and ask for a completion date. In California, invoices can list replaced parts the shop kept (such as cores). Settings only change documents you create from then on — ones you already sent stay as they were.
12Exporting invoices for your accountant
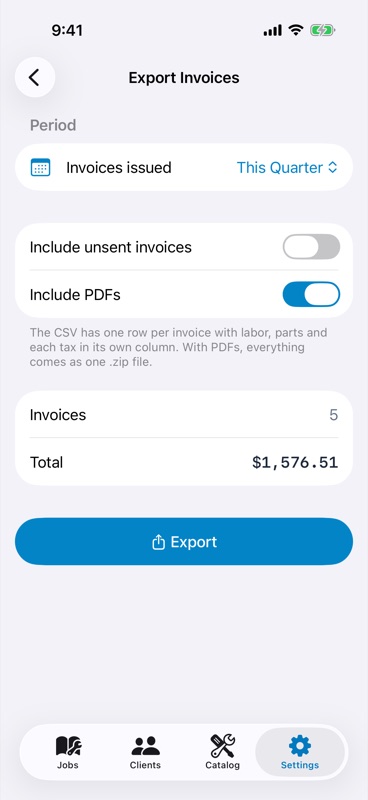
Go to Settings → Export Invoices and pick a period — this or last quarter, this or last year, all time, or a custom range.
You get a CSV file with one row per invoice, with labor, parts, and each tax in its own column. Leave Include PDFs on to get every invoice PDF too, all in a single .zip. Unsent invoices are left out unless you turn on Include unsent invoices.
Tap Export and send the file by Mail, save it to Files, or AirDrop it to your computer.
13iCloud sync & Recently Deleted
AutoEstimate saves everything on your iPhone and backs it up to your private iCloud, so your jobs follow you to a new phone. The iCloud status is shown at the top of Settings. NVKLabs never sees your data.
Deleted jobs and clients aren't gone right away — they wait in Settings → Recently Deleted for 30 days, and you can restore them from there. Deleting a client doesn't touch their jobs.
14Free vs. Pro
AutoEstimate is free to start. The only limit on the free plan is 3 jobs in total — after that, you'll be asked to upgrade before creating a 4th. Settings shows how many free jobs you have left.
Everything else — VIN scanning, estimates and invoices, the service catalog, PDF styles, and invoice export — is included on the free plan from day one. Pro removes the job limit, with weekly, monthly, or annual billing. Manage or cancel your subscription anytime from Settings → Manage Subscription.
15Need help?
For support, feature requests, or questions about using AutoEstimate:
- Email us at support@nvklabs.com, or tap Contact Support in the app's Settings.
This document was last updated on September 29, 2026.